
Create powerful photography using first surface mirrors.
In this post, we will show you how to step up your photography expertise by using optical glass to create one of a kind effects without photoshop. Use these new skills in every area of photography and expand your creativity.

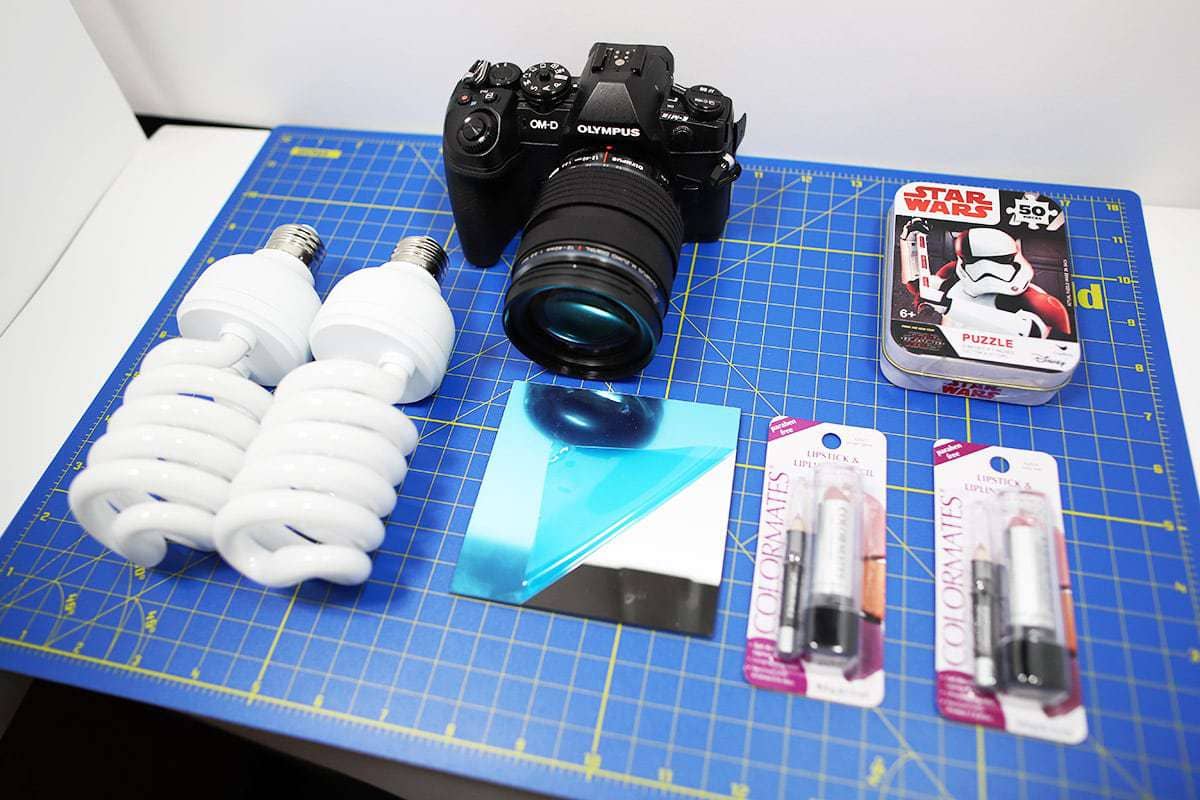
DSLR, fluorescent lighting, glass first surface mirror, and products.
Let’s begin. So you want to use mirrors to create unique photography?
What is a first surface mirror?
A first surface mirror or front surface mirror will have the reflective mirror surface on the front side of the glass. Where on a standard mirror you will find it at the back of the substrate and unusable from that side. It maximizes light while minimizing distortion.
First surface mirrors are primarily used for projecting clear sharp images in applications that include: 3D printers, Optical Imaging, Digital Signage, 3D Entertainment, Astronomy/Telescopes, Gaming, Flight Simulation and more.
Glass or Acrylic?
First surface mirrors come in glass and acrylic. Glass first surface mirrors will always be of a higher quality than acrylic. The coating will be flatter as well as the material itself. Acrylic tends to bend in larger sizes and will have small imperfections on the surface.
It is much easier to clean and maintain a glass first surface mirror rather than an acrylic first surface mirror. Acrylic mirrors tend to be a little less expensive compared to the glass material. Take a good look at both options to determine the best mirror for your project.


Notice the small waves distortion in the aluminum mirror coating from further away when shooting the reflection of an acrylic first surface mirror.

You’ve seen first surface mirrors in action but may never have realized it.
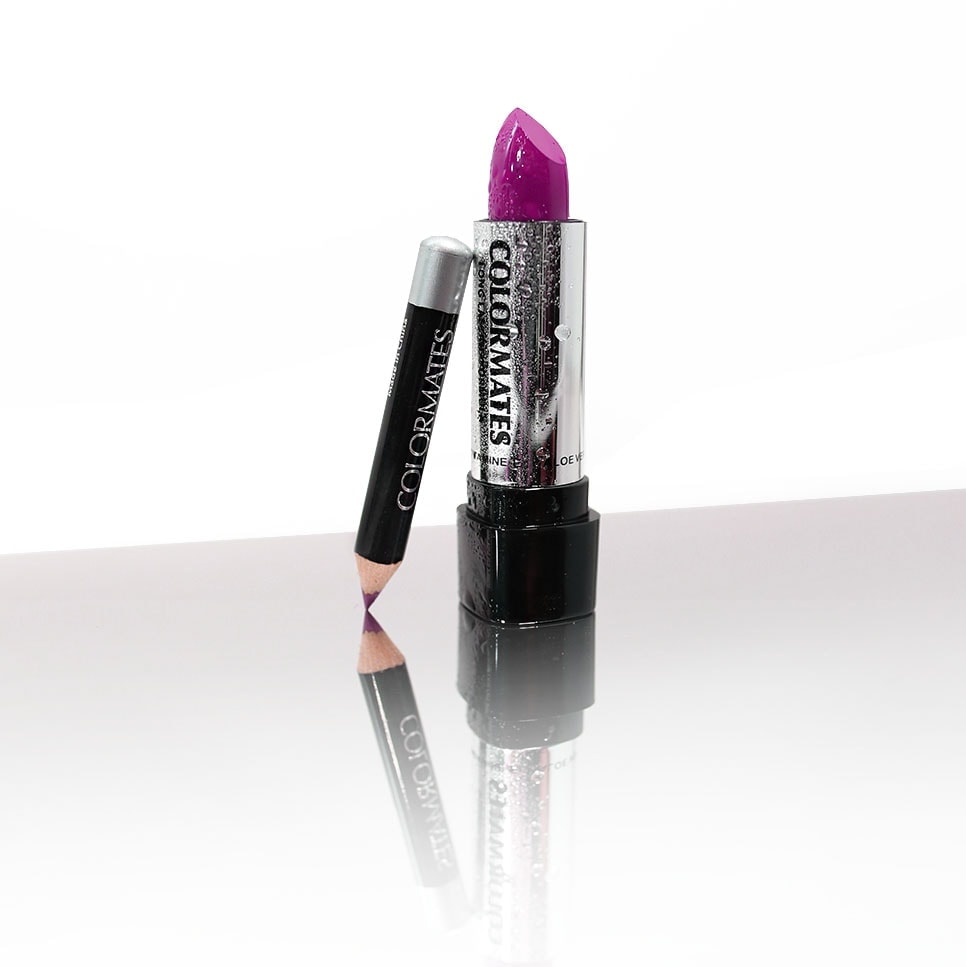
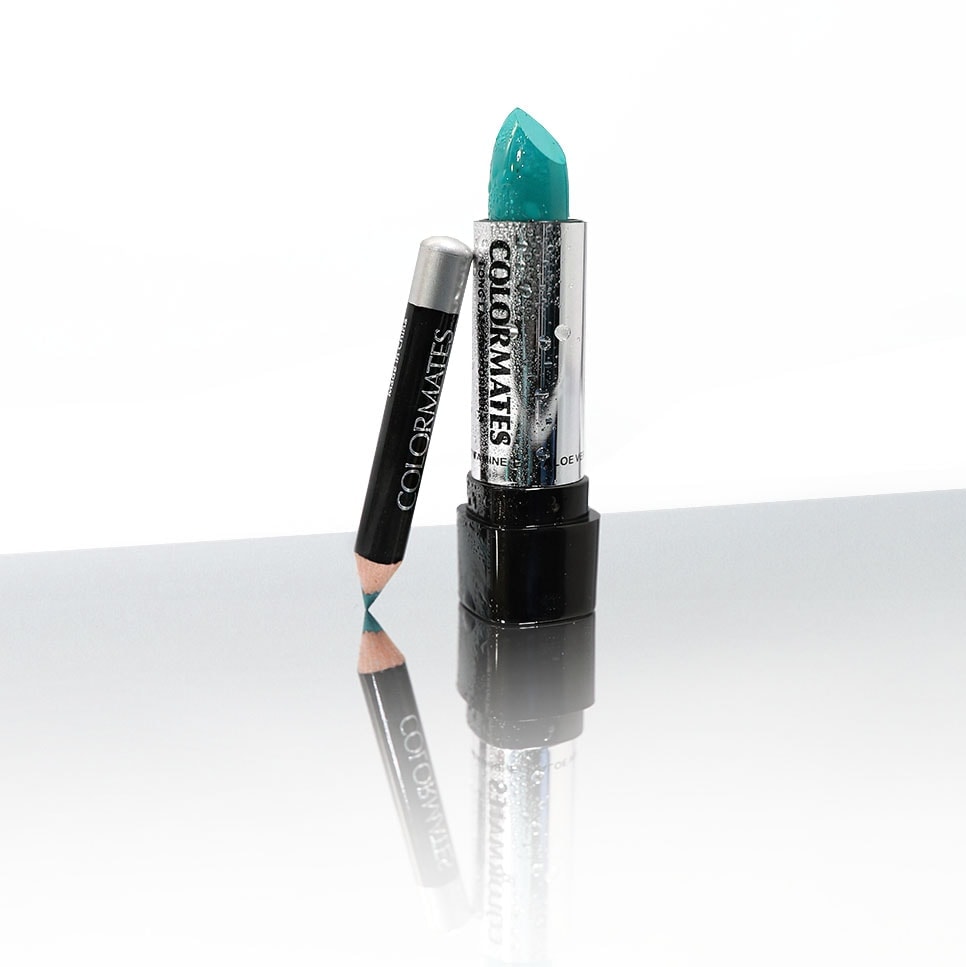
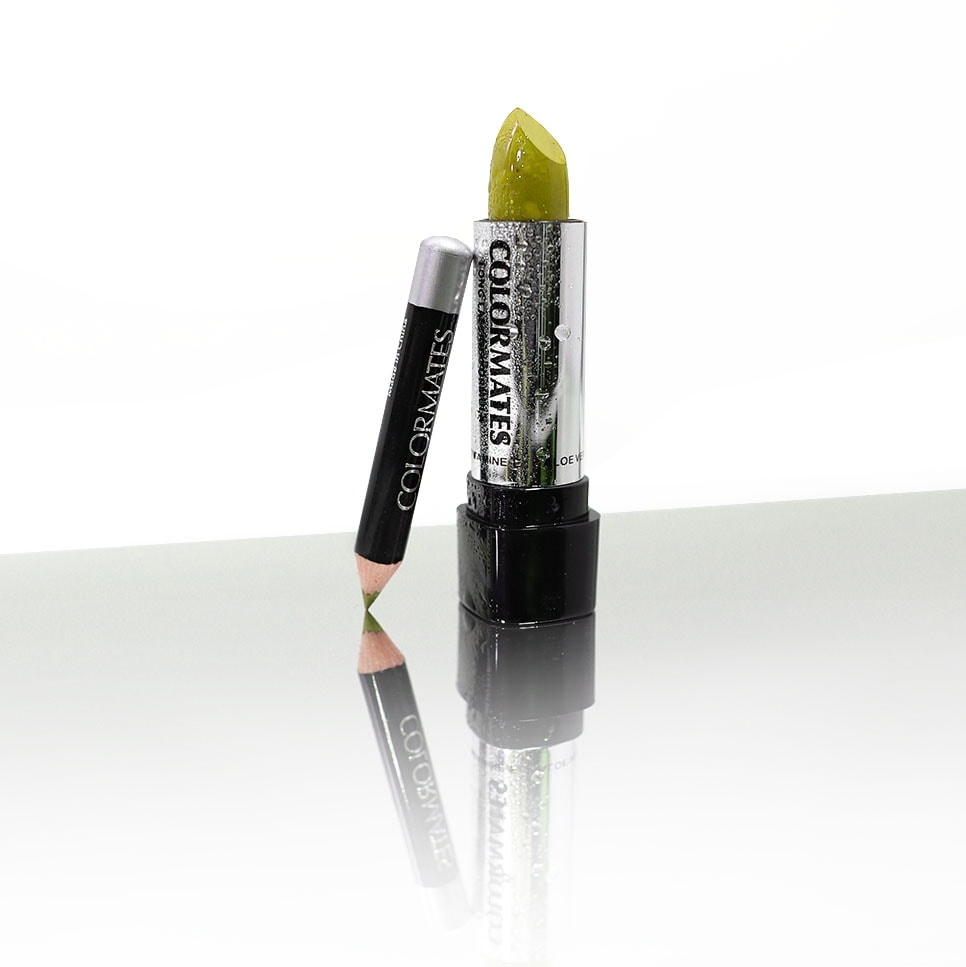
First surface mirrors are very commonly used in cosmetic product photography. It gives a slick and polished feel to the image when the product touches its own reflection and there is no visible space between the product and its reflection. For example. The image below on the left is with a standard mirror. The image on the right is taken with a first surface mirror. Notice the optical quality of the reflection on the right compared to that of a standard mirror on the left.
Standard Mirror

A standard mirror reflecting a fingernail tip. Notice the space in between due to the mirror coating located on the back.
Glass First Surface Mirror

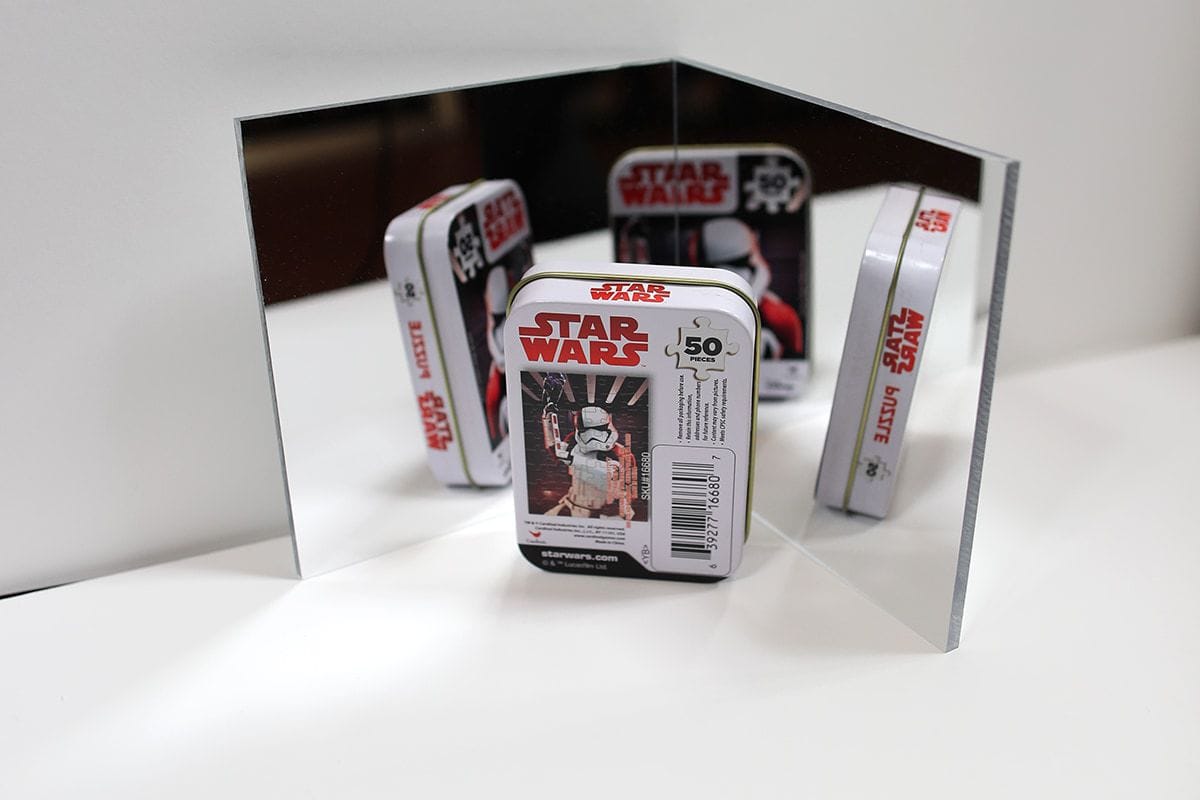
Glass first surface mirror reflecting precision tweezers. Notice the tweezers reflection is touching itself due to the reflective coating being located on the top of the mirror.
First surface mirror photography examples,


Do you have to be a professional photographer to use first surface mirrors?
Not at all! First surface mirrors and other optical mirrors are great for beginners, intermediates and pros alike. Experiment and find your style. They are a great addition to any photographers collection. Order a few samples to get started.
Where to start when using a first surface mirror for product photography?
The set up.
Need your product touching its reflection without space? This makes for a clean product picture. No photoshopping an image copy-reversing-mirror-layer required.
To do this use the first surface below your subject. Place the item the way you’d like it facing. Be sure to have a large enough mirror to capture the item within the reflection.
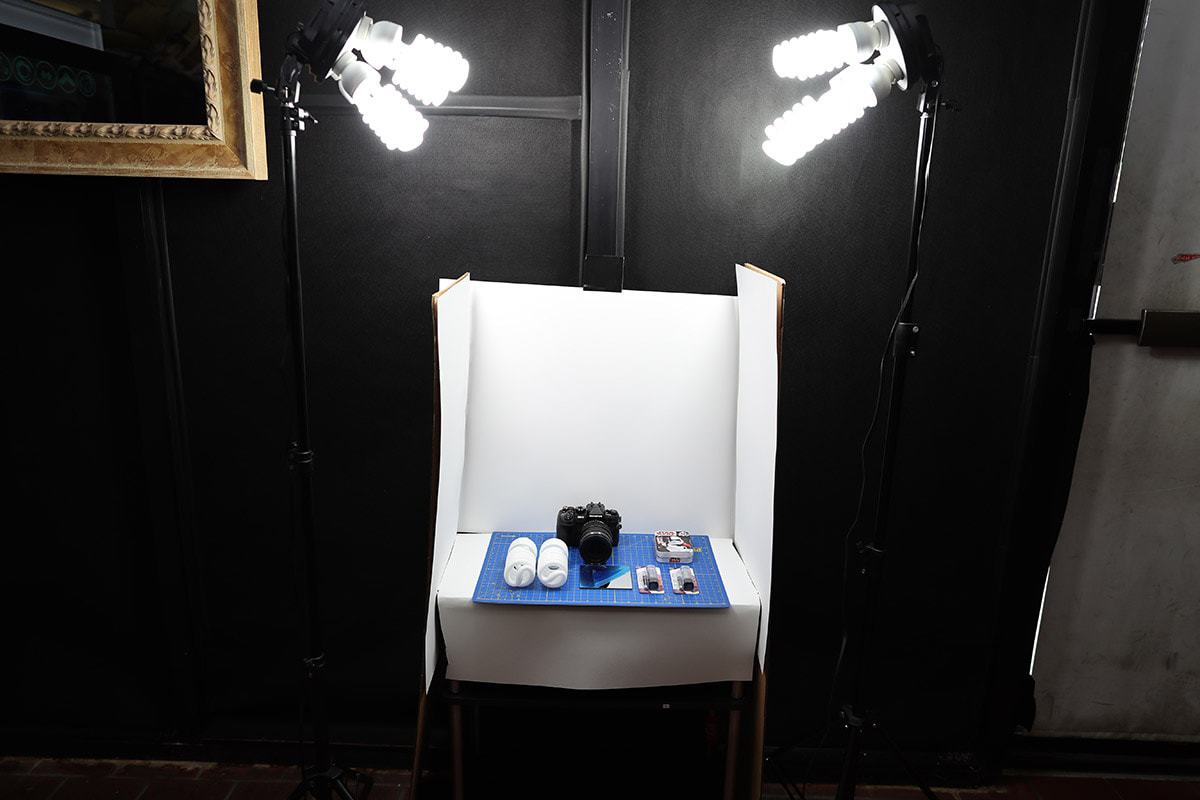
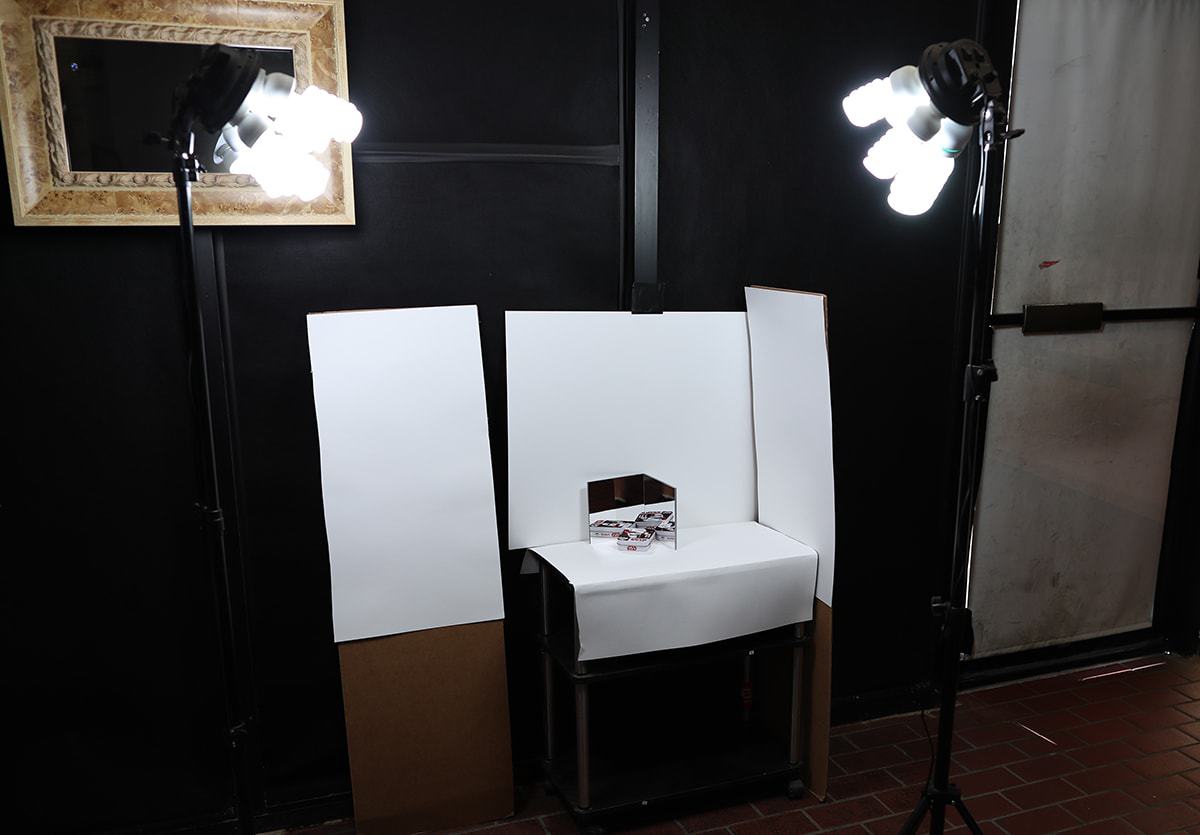
First, I constructed an area with three white walls. All white to evenly bounce the light off of. You can DIY this or Amazon sells pop up lightboxes depending on what type of product photography you are aiming for. For this demonstration, I’m going to stick with the common white background product photography.
I used two continuous lights to help brighten and spread the light. I also used this handy Newer TT650 Flash Speedlite and bounced it back to create some more dramatic lighting.
Originally I had a small four inch by four-inch mirror. I ended up upgrading to a larger 8″ x 14″ mirror to make shooting from all angles easier without moving the mirror.
While adjusting my settings I wanted to meter for completely even light. This would help me with the editing process in Adobe Photoshop if nothing was over or underexposed.
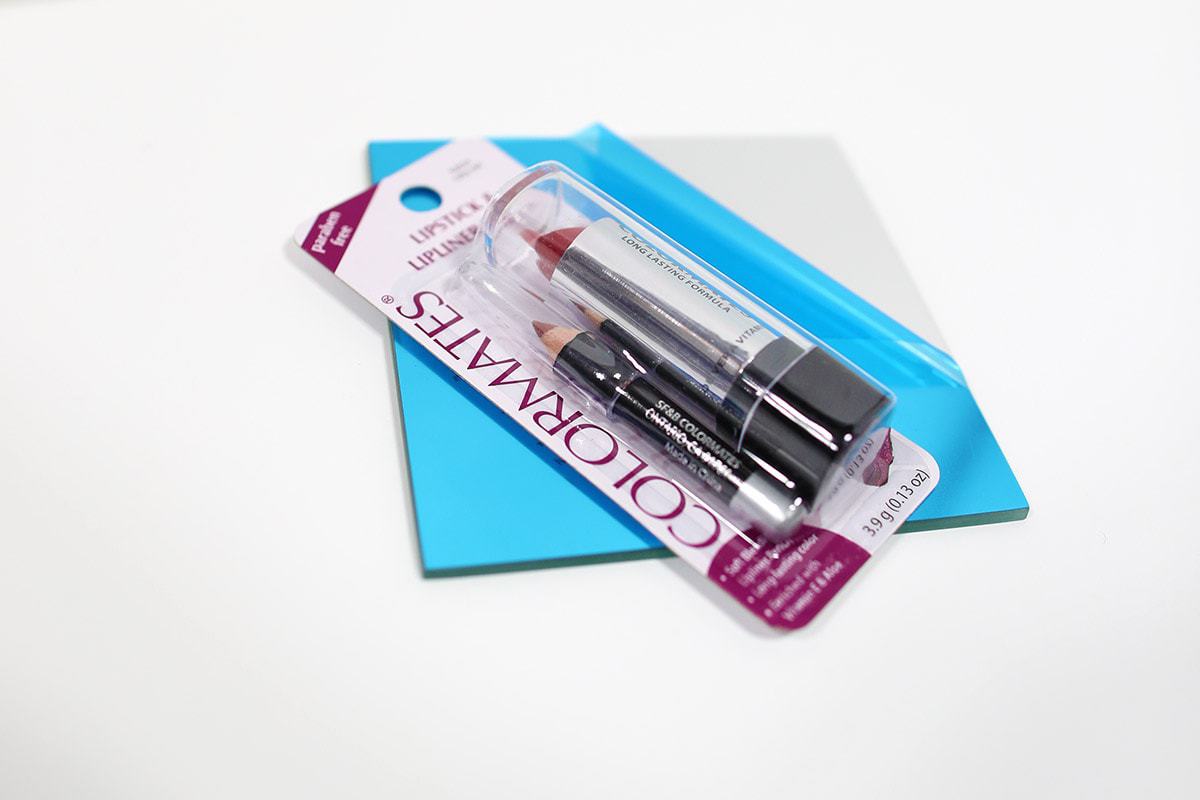
I also found the plain lipstick and liner duo boring. I ended up spraying isopropyl alcohol on the stick to create an even wet mist and give it some more personality.
Raw image right from the camera.

Halfway edited.

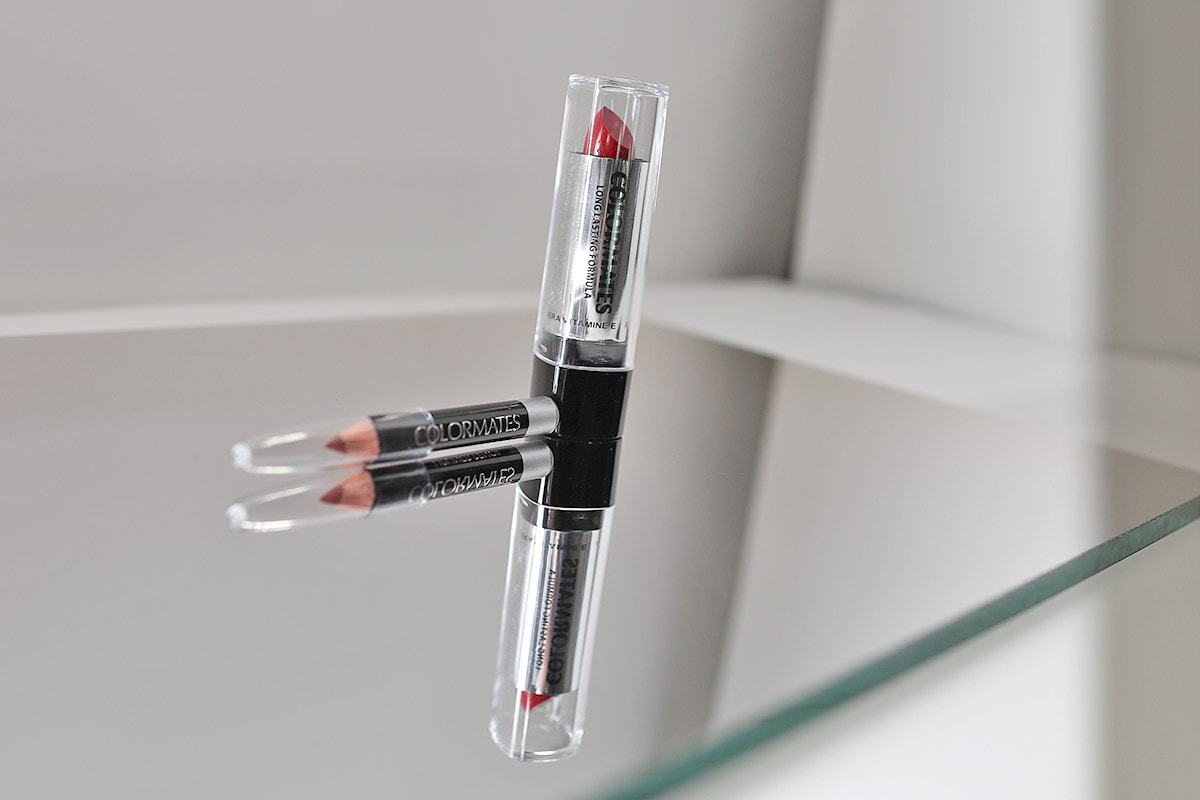
For the final edit, I wanted the top of the product to be completely white while the lower half faded out. I could have deleted the background entirely only leaving the reflection fading into the whiteness. In the end leaving the silver reflection from the mirror makes for a nice composition.
Finished image.

The final edited image of our dollar store brand lipstick and lip liner using the glass first surface mirror to create a flawless reflection for a product photo.
Now that I have the final file, all I have to do to change the color of my perfect product photo is adjust the hue in photoshop.
How do you set up a non reversing mirror photo shoot?
A non reversing mirror, also known as a “True Mirror” is common among artists, displays, nail salons and more. Using two first surface mirrors joined at a 45-degree angle creates a non reversed reflection. See yourself, as others see you. Angle the mirrors further to create an ongoing infinity effect within the reflection.
What type of effect are you going for? This will help determine your set up and how many mirrors you will need.
A forty-five-degree chamfer on the two mirror sides that will be touching will make for the cleanest seam between the glass substrates which means easier photo editing when trying to rid yourself of the line.
The size of the mirrors will depend upon your subject. See the images below to how we DIY’ed our set up to create perfectly non-reversed images through the mirror.
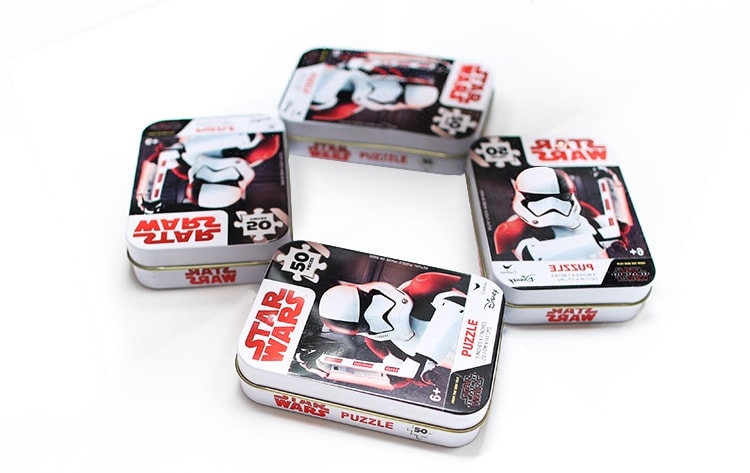
This type of photography is great for capturing multiple reflections and making it appear like you have more than one product.
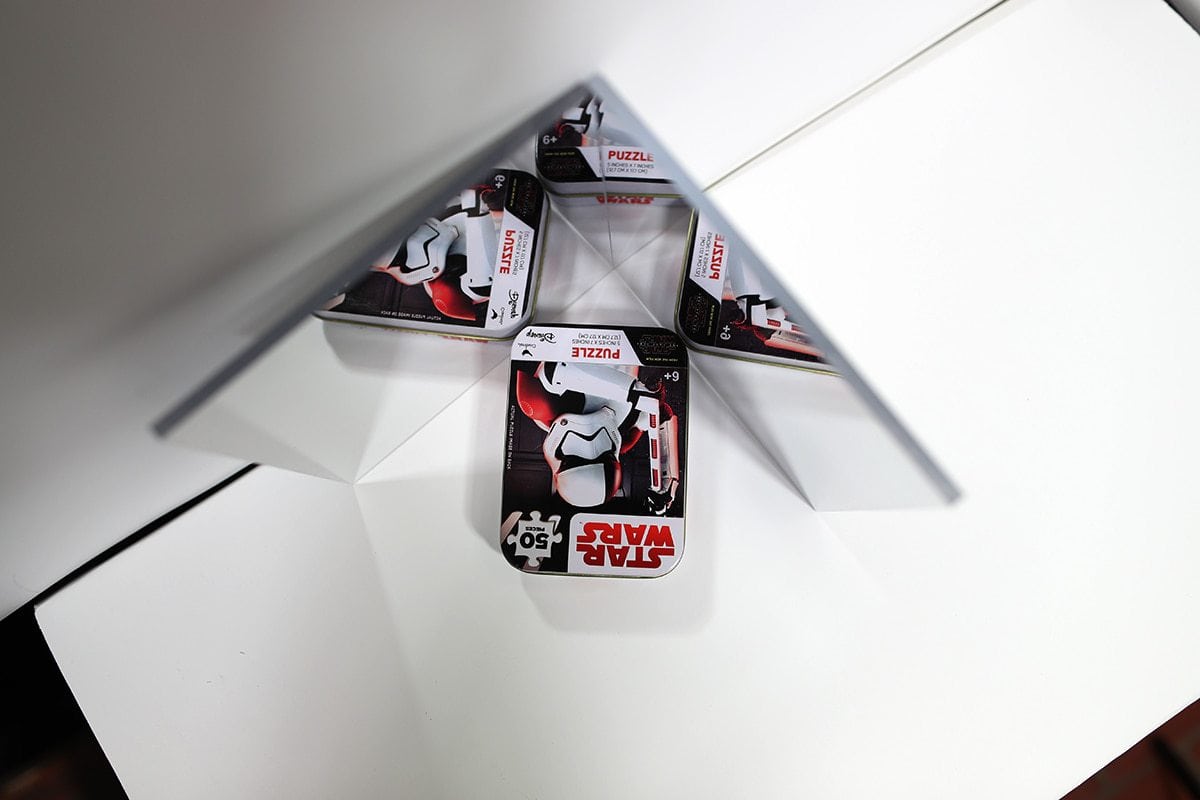
In the example below I have a small 2″ x 3″ aluminum puzzle container from the dollar store. It is in front of two acrylic 6″ x 6″ first surface mirror samples. The angles are not permanently bonded or chamfered so you can see the thin line between both mirrors. Slide the arrows left and right to see the before and after image using the true mirror for product photography.
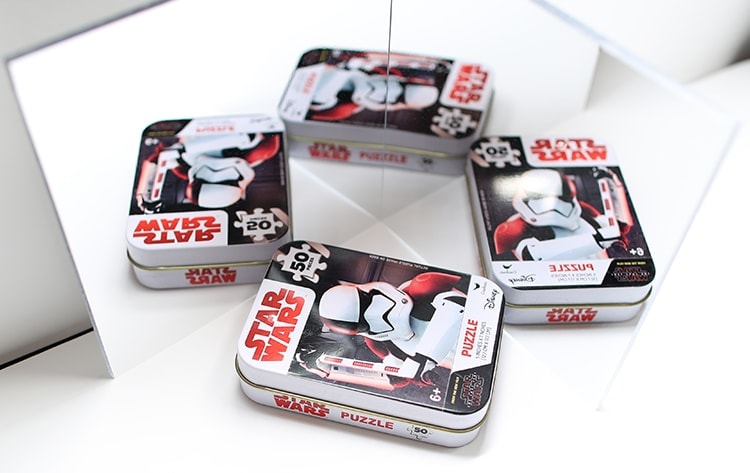
Aluminum star wars puzzle tin in front of two acrylic first surface mirrors.
Want to protect your equipment and shoot from further away?
Then you’re going to need a clear, crisp and accurate reflection. The flatter the glass first surface mirror the less warping the camera will pick up on the mirror coating.
This is a fairly common request from our customers! Our first surface mirror glass has been used in many scientific explosions and testing. Protecting the equipment while managing to capture the data from the mirrors. Or first surface mirrors used for film effects and dangerous stunts where the camera needs to capture the action safely from a distance.
Our mirrors are also used for capturing wildlife. A neat National Geographic photographer secret. When you can’t safely get close enough to the subjects having a glass first surface mirror is a life-saver. Also maneuvering the mirror to capture different angles leads towards better photography that you would not be able to capture otherwise.
Have you ever heard of a Right Angle Spy Lens? This lens attachment has the optical glass front surface mirror within it at a 45-degree angle. Now you can capture truly candid photography. A great concept, especially for wedding photographers with shy or easily annoyed guests.
How to use a beamsplitter mirror for pepper’s ghost and other camera effects.

Beamsplitter mirror shapes.
Now we have our beamsplitter mirrors! It’s a bit different. Let us explain why.
What is a beamsplitter mirror?
A beamsplitter mirror, otherwise known as a teleprompter mirror, allow your camera to record through them with flawless tint free picture quality while providing a crisp forty percent reflection on the front side of the glass.
You may have seen this optical mirror in HUD displays, 3D camera rigs, smart mirrors, hidden televisions, holograms and many more. Beamsplitter mirrors have been used in film production as early as the 1950’s. But they have been used in theatre since 1862! A more famous effect you may recognize includes the resurrected Tupac Shakur hologram performance. Same concept as the peppers ghost but on a much larger scale.
The half-silvered optical mirror allows light to pass as well as reflect.
DIY Hologram for Photography or Videography

Four trapezoidal optical mirrors. Cut and ready to assemble into the hologram mirror shape.


Here we have a YouTube hologram simulation running on a cell phone with the mirrors placed over and resting on the front of the screen. The animation is then projected on the glass giving it a 3d feel. Holograms and other pepper’s ghost effects are limited to creating the animation on a completely black background to give the illusion the object is “floating”.
First surface mirrors and beamsplitter mirrors are only the beginning of optical mirrors we have available. Check out our samples.
Find our blog here for other cool projects you may be interested in learning about.
This Post Has 0 Comments